

I transferred the image to some natural colored muslin using a sharp pencil, and then embroidered it with some black pearl cotton using a stem stitch. When I was all finished embroidering, I decided I wanted to add some color.........sooooo, I took out some color crayons and shaded the body yellow and the beak orange. I covered the image with a piece of white paper, and then used my iron to heat set the color and soak up any wax. I think it turned out great, and I will definitely use this method again in the future!
For the bag, I cut 2 strips that were 2" by 9" (the length of my embroidered piece) and sewed them with 1/4" seams to the top and bottom of the stitchery. The back, and lining pieces were cut out at 8 3/4" by 9", and I fused a piece of fusible fleece to the back & front panels for extra padding to protect those delicate bamboo knitting needles. The handle was cut at 3" by 14". To make the handle, you take your strip and fold in half lengthwise, and press. Unfold, and fold each raw edge into the center line you just created. Press. Fold in half again and press. Cut out a piece of fusible fleece 3/4" by 14, and fuse inside the handle, and then topstitch close to both edges.
The rest of the pouch was constructed similar to this tutorial at Skip To My Lou. Here is my finished knitting project bag!
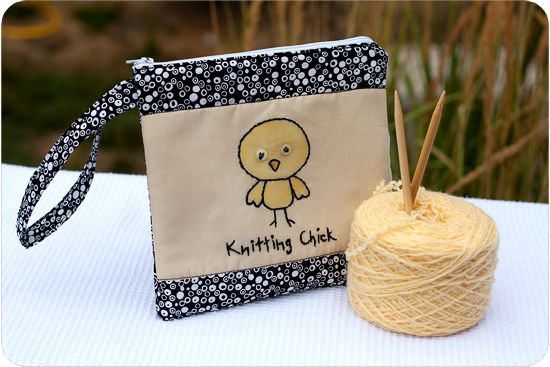 |
| Front of Bag |
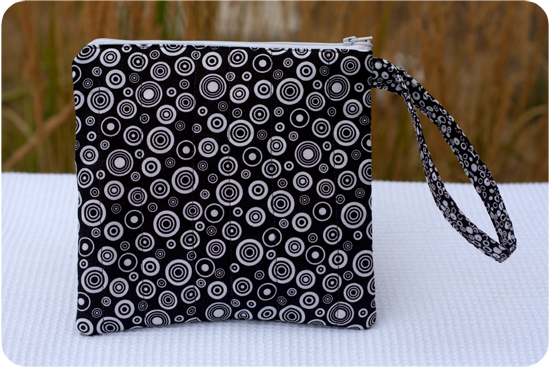 |
| Back of Bag |
 |
| Inner Lining |
No comments:
Post a Comment