Monday, April 14, 2014

AHOY me MATIES!!!

Our five year old's most fervent wish this year was for (you guessed it):  A Pirate Party.  I'm sure this is due in no small part to the copious amounts of "Jake and the Neverland Pirates" that my littles have been watching for the past few months.  Nevertheless.... a pirate party was the order of the day. 
 
First things first... the decorations.  I used this tutorial from GloriousTreats to sew up a sturdy bunting for the birthday girl that could later hang in Captain Emma's bedroom!
 
 
I made a template using the font Franklin Gothic Heavy in photoshop, so I could cut her name out of black, iron-on fabric (typically used for patching jeans or pants).  This was a lot more cost effective than buying each iron-on letter... and I really like the way it looks! 
 
I
 
Next came the goodie bags!  I found a SUPER tutorial on Kitty Baby Love for sewing a drawstring bag with no exposed seams (using the french-seam method), and whipped out these little beauties from some pirate skull dotted fabric :)  Notice the odd man out sewn out of leftovers... (we just made that one the Birthday Girl's special bag!)


Next up were the pirate games (ARRGH!)  We read aloud the book, Pirates Go to School


and played "Pin the Patch on the Parrot" and "Sink the Boat" & "Walk the Plank" (see explanations here on PartyPlanningMom).  We also had lots of "Pirate Accessories" for the kids (AND PARENTS!) to dress up with!


Lots of pirate fun was had by all :)  
 

Saturday, March 29, 2014

We've been sewing up a storm this week.. and just look at all of the new things we've added to the Etsy store!  Several new coordinating project bags/ notion case sets:


As well as a NEW design... See-Through Vinyl Zippered Notion bags:
 
As well as a whole LOT of zippered notion bags!
 
 
It's so much fun to sew with happy fabrics!  Hope you have a great weekend :)

Follow my blog with Bloglovin

Thursday, March 13, 2014

Taste the Rainbow

What's the best way to lighten up a dreary grey day here in the Pacific Northwest?  To dye your own rainbow, of course!  I've been wanting to dye some rainbow sock yarn for months... but there was never enough time (or opportunity, with all of the littles underfoot).  So.... I waited for the perfect opportunity (AKA naptime) and went for it.
 
I decided to try dyeing my "rainbow" two different ways (on separate skeins).  I wanted to do a "self-striping" skein and then a handpainted skein - and contrast the two methods.  So the first order of business was to prepare the yarn. 
 
I wound the first skein into a center-pull ball, pulled out my "Martha Stewart Craft Loom" that I have never, ever used... and set up the bars and pegs so that I could wind mini-skeins onto it easily.  I wound about 5 times per section, and then moved onto the next section.  I figured this would give me even stripes of all of the rainbow colors (which would then repeat over and over again in the socks).  I tied up all of the mini-skeins separately and put them into a vinegar/water bath to soak. 


For the other skein that I wanted to hand-paint, I just popped the entire skein into the same soaking water, and set about preparing my dyes.  I made sure to do this part while everyone else was busy elsewhere, since I needed a facemask and gloves to protect myself from the powdered dyes.  I measured out 1/2 teaspoon of 3 different PRO Chemical acid dyes (red (magenta 338), yellow (yellow 119), and blue (blue 490) into mason jars, and dissolved the powder in 1 cup of boiling water.  I then drew out 3-4 tablespoons with a syringe of each of these "primary" colors to mix up the secondary colors (orange, green, and purple) to complete my rainbow.
 
 
I topped up the jars with more boiling water to give the bath enough volume to dye the yarn more evenly, and then put a portion of each dye into squeeze bottles for the handpainted skein.
 
 
By this time, my yarn had soaked for about an hour, and I was ready to commence!  I put each one of the "mini-hanks" from the loom board into a mason jar sitting in a bot of boiling water on the stove, and cranked the heat up to keep the mixture just below boiling.
 
 
Then it was time to head outside for the hand-painted skein.  I set up a card table on our deck (carefully covered in plastic trash bags, and a light layer of plastic wrap), and layed out my wetted skein in a large oval shape.
 

Then it was time to enlist the help of the two older kids (we are homeschoolers - after all.  I mean... this project has "SCIENCE", "ART" and "COLOR THEORY" written all over it!!!)  I helped them get out the plastic gloves to protect their skin, and we squirted, pressed, mixed and squished our dye all in.


We then mopped up all of the leftover dye and water from the table, and wrapped the yarn up in its plastic wrap sheath, and steamed it in a tin foil "boat" over a boiling pan of water for about 20-30 minutes to set the color.  I just love the resulting yarn!


We also removed the self-striping yarn from the mason jars on the stovetop, rinsed it until clear with a little bit of dishwashing soap, re-skeined it and dryed it as well.  Here's the result from that experiment: 


However, as anyone who has ever bought hand-painted yarn can tell you, when it's all wrapped up in a skein straight from the dyepot... the color can be a might deceptive.  You really need to re-skein it to get a better idea of what it will look like in a finished knitted item.  Here's the two yarns after drying and reskeining.
 
The Self-Striping, Mason Jar yarn:
 
 
And the Hand-Painted, Homeschool Friendly Yarn:
 

The handpainted yarn ended up just a tad lighter than I would have expected, probably because it wasn't exposed to as much dye as the mason jar yarn.  But both look good enough to eat! (Can't you just taste the rainbow?)  And the best part is that the kids were THRILLED with their hand-dyed product!  Each skein is about 450 yards of a superwash, nylon mix and will be just the thing for hand-knitted socks :)


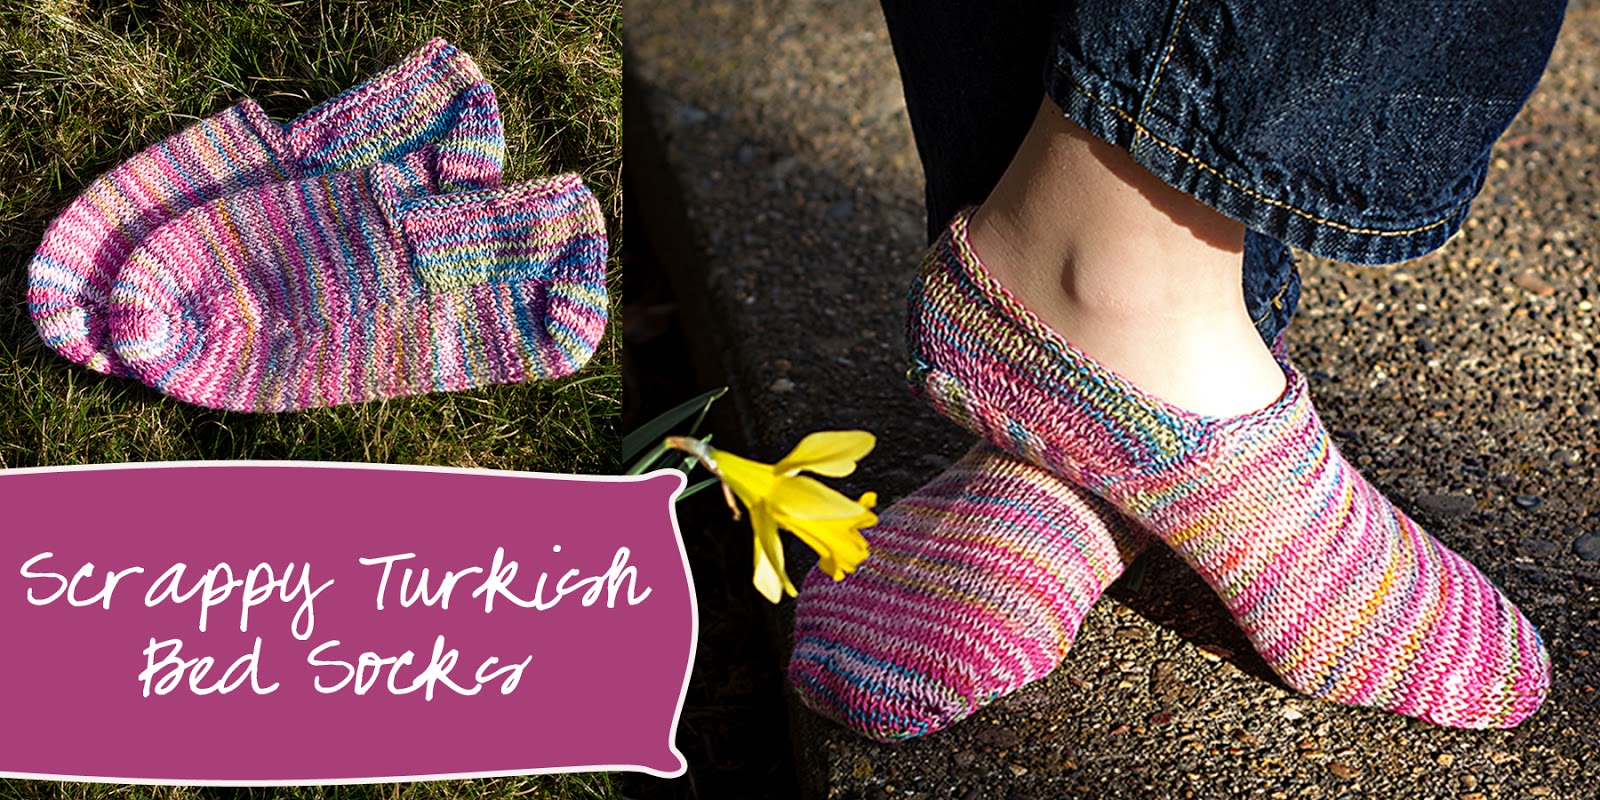
Edited to add:  It's taken me a couple of months, but I now have the kid's handpainted yarn all knit up into socks, using the 
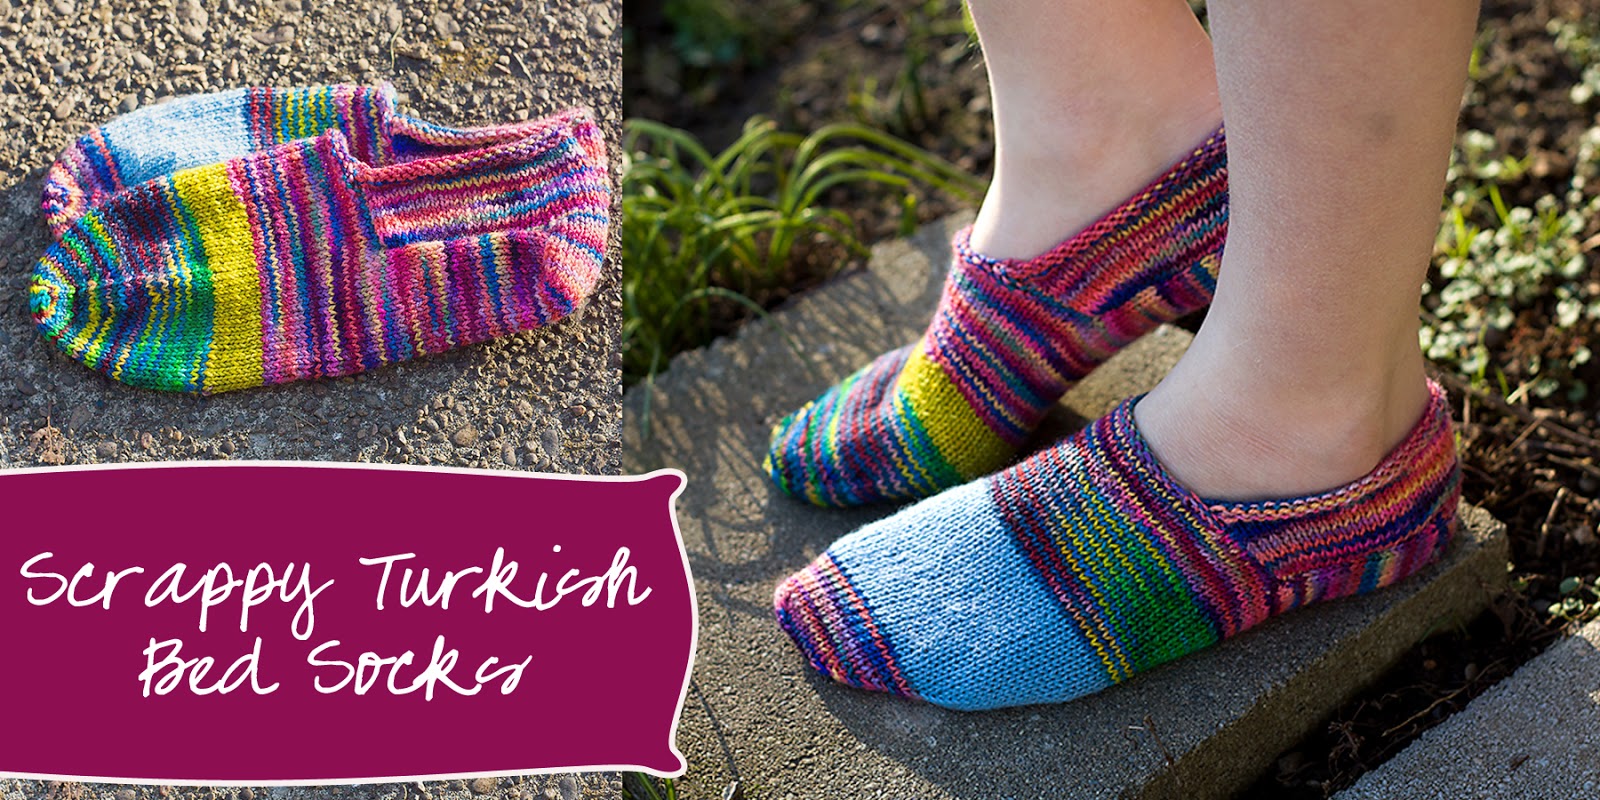
"Vanilla Latte" pattern on Ravelry.  I love the way the differently dyed yarns ended up looking!  Here is my daughter modeling her socks with an Eye of Partridge heel:


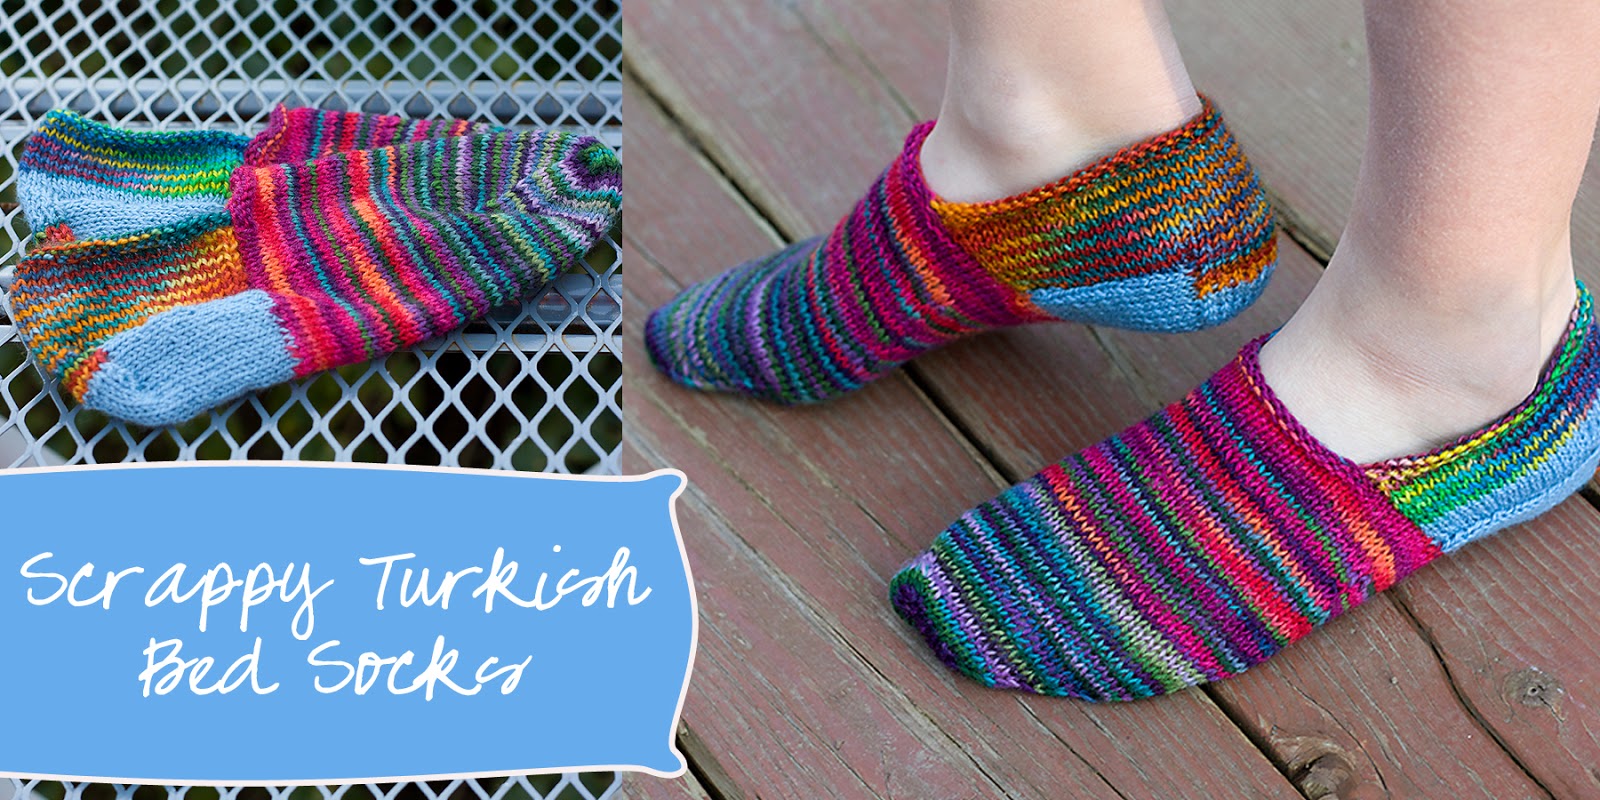
and my son, with his beloved, super bright warm feet:


My older kids (12 & 9) were just the right age for this kind of dyeing.  If you are trying this with littles, I would probably stick with the food-safe dyes (for their skin, and your sanity) - but I think all ages would enjoy a similar project!  I hope this post inspires you to do some dyeing of your very own :)  Enjoy!


Monday, March 10, 2014

Project Bags Galore

I've been hard at work updating my Etsy store with all of my favorite kinds of bags!  I love project bags... there is something so satisfying about a line of little bags stuffed full of knitting-in-progress lined up beside my favorite chair..... I like them with handles...... I like them with drawstrings... and I like them with zippers..... and I've sewed up a whole selection!
 
 
I have several things on sale, as well as coordinating zipper bags.. so come on over and maybe you will find something fun for your knitting to live in as well!

Monday, March 3, 2014

Lost No More! - {with free pattern}


I just love stitch markers… they turn even an ordinary knitting project into something special!  The only thing I don’t love about them is how easily I seem to lose them.  They slide off into neverland… into the bottom of project bags, and in between my couch cushions.  The solution?  Stitch marker sized traveling pouches!  I think these little pouches are so cute (and easy to sew!)


Ready to sew?  You need to cut a strip of your chosen fabric 2.5" by 11", as well as a piece of iron or sew-on interfacing 2.5" by 5.5".  The interfacing gives your finished pouch a little more body, but it is not absolutely necessary.


Fold the main fabric in half lengthwise (right sides together) and either fuse or pin your interfacing on top.  Stitch, 1/4" around the outside edges, leaving a 2" hole on one long side for turning.
 
 
Now, turn it right side out through the hole on the side, and press (please, please, please press.  Really.  It will make your life sooooo much easier!)  Next, it's time to add the snap.  I use plastic resin snaps with a hand-held snap press (like these ones).  They have recently become readily available at many local fabric stores (I used to have to order them from China, and wait a long time for them to arrive!)  However, you can use any closure you would like (velcro, button, metal snap, etc).  Place a female snap centered, approximately 5/8" down from one short side. 
 
Fold the piece you placed the snap on up to make a pouch about 2" tall, and stitch close to the edge up one side, across the top (this will be the flap), and down the other long side.  This will make the pouch, and close up the turning hold on the side, all in one fell swoop!
 
 
Fold the flap down to mark the placement of the male snap, and put it in place.... and there you have it!  Your very own stitch marker pouch :).


Tuesday, February 25, 2014

Scrappy Work

I'll just come out and admit it.... I'm a sockaholic.  Really, the only reason I learned how to knit is so I could make socks.  And while I have branched out a bit in my obsession (I mean.. I make sweaters, hats, and mittens too)..... really?  It's all about the socks.
 
However, this leads to another dilemma.  After you cast-off your handmade work of art for your feet, there is ALWAYS a bit of leftover yarn.  And not just a little yarn, either.... enough that you would feel very guilty throwing it away (especially now that I find myself preferring the "good stuff").  What to do? 
 
Well, I have finally hit upon the solution.  Scrappy.... everything.  I think when most people think scrappy... they think things like "Obvious Colorbreaks... and Clashing Colors".  Not so!  A little blending goes a long way, and takes those scraps from something guilt-ridden to something fabulous!
 
I normally cast on with just one color and knit with it for a while.. and then start striping with my other scraps at odd intervals (2 rows one color, 1 row of another, 2 rows same color, 3 rows of another), carrying my yarn strands up the side in an inconspicious spot (NOT in the bottom of the foot, lol!)  And I have fallen in love with the result.  Not only does my pocketbook thank for me for using up all of those pricey little bits, I just love the colorful outcome.  Check out these scrappy beauties, using the Turkish Bed Socks pattern by Churchmouse Yarns and Teas:
 
This first pair uses up three different variagated pink yarn scraps:
 

And this pair uses some of those SAME pink scraps, along with FOUR other different yarns:


The key is in the blending.  I know some of you are shaking your heads right now and saying something like... "But what about all of the ENDS you will have to weave in?"  Oh no... remember?  After you add in your next yarn, you just keep carrying it up the side.  This means that you really shouldn't go more than 2-3 rows with the same color, so you don't have large "floats" inside... but, it's just not as bad as you think :)
 
Here's some more examples; these ones have a bit more obvious color striping.. but only because that was the effect I was going for...


 And these are just slippers... what about using up odds and ends for an entire, adult length sock?  These are my hubby's very favorite pair at the moment (with more skeins that I can count)...


And I just finished up these "Blended Vanilla Latte Socks" for a dear friend :)


So, give it a try!  Break out all of your scraps, and cast on :)  I bet you will love the result!


Friday, February 21, 2014

Time for a Cuppa?

Nothing kicks me into high gear like an upcoming swap on Ravelry!  (By the way... if you knit or crochet.. and you don't know what Ravelry is, you need to head on over and check it out!!!)  Crafty-wise... there is nothing I like more than to sew/knit/craft the perfect package to send out to my swap partner.
 
The "Just Add Water" swap in the Ewe LaLa group on Ravelry was certainly no exception.  The idea was to come up with a tea-themed package that would delight its recipient :).  First... the tea cozy!  My swap partner's kitchen has touches of lime green... so I went with the reversible Emily Tea Cozy pattern in cream and lime green.  I knit the front and back pieces 2-at-a-time magic loop.  This is my very favorite way to knit something that has more than one identical piece, because you are assured that they are exactly the same size, and you only have to read the chart once!


Next, I knit up a sweet little dishcloth (also in lime green) using 100% cotton, with a cute teapot motif, "Tea Pot Dishcloth by Rachel van Schie"


Of course, I also included lots of other fun hand-mades, some yummy tea, and scrumptious yarn....


However, I think one my very favorite things to make was the embroidered tea towel :) (also in lime green, of course!). 


Just in case you would like to embroider your own sweet little tea party towel, I've included a link to my free pattern below (just click the picture).  Have a cuppa on me!
 
 
https://dl.dropboxusercontent.com/u/74477577/Strawberry%20Tea%20Embroidery%20Pattern.pdf